


Revell 1:72 Airbus A400M
+3
jamesv9820
scotthldr
TomTwin
7 posters
Page 1 of 1

Revell 1:72 Airbus A400M
![]() TomTwin Mon 10 Sep 2012, 08:08
TomTwin Mon 10 Sep 2012, 08:08
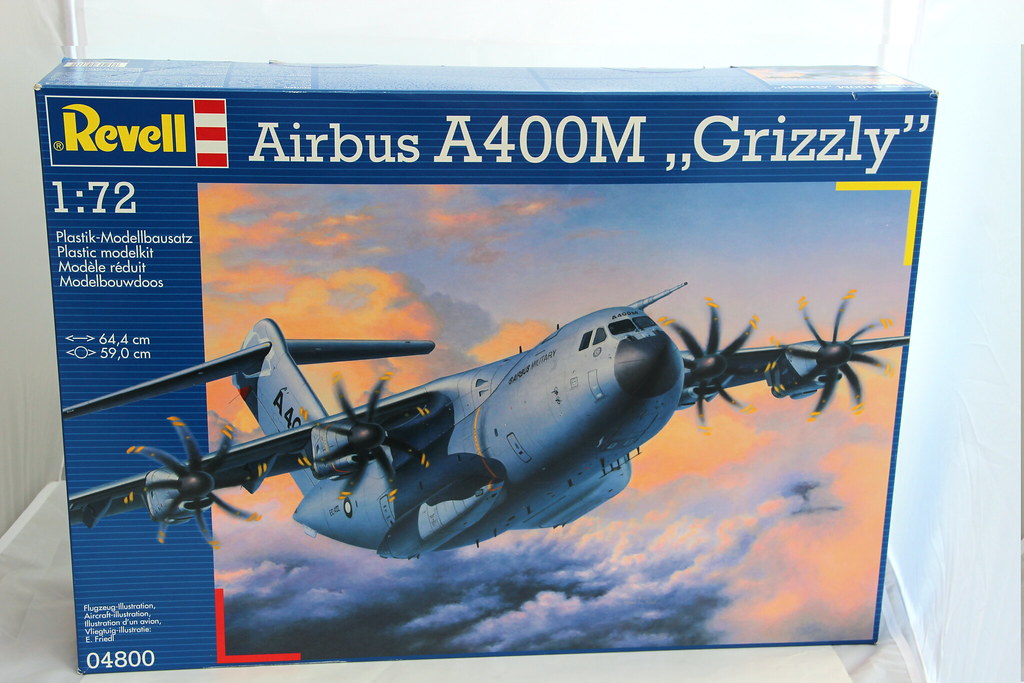
Here is my Revell A400M I'm currently working on.
Box shot to begin with then!
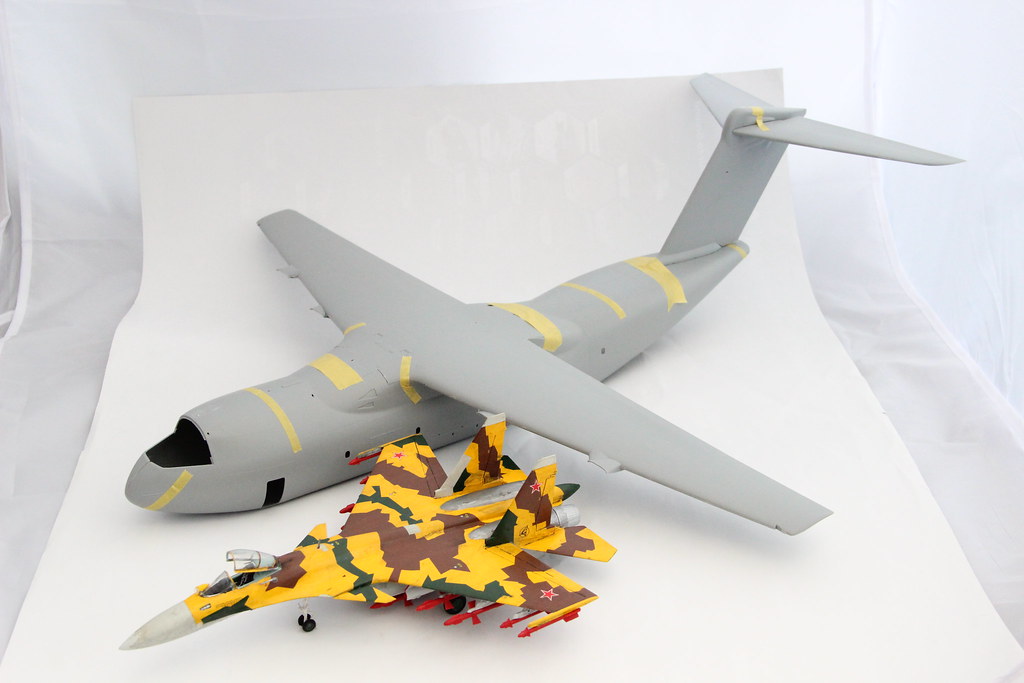
A little dry fit to begin with, after the sub assemblies had been assembled.

And to prove it's size, here is a 1:72 Su-35, which is in itself a big model.
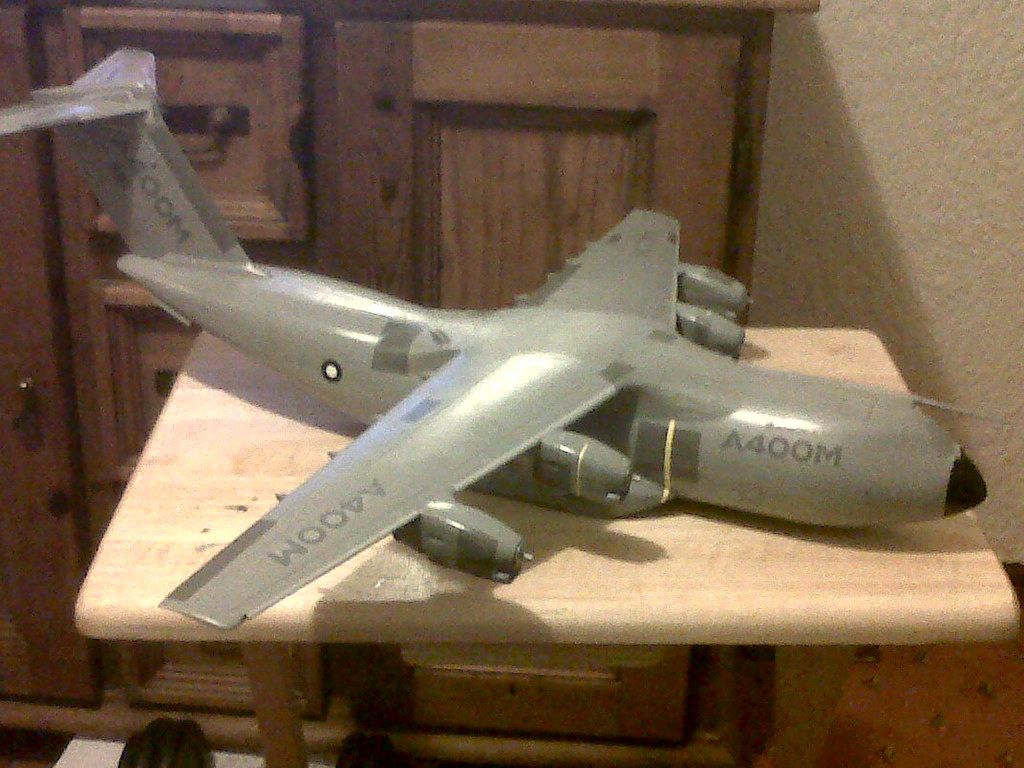
The interior, painted and assembled.


Most of the filling and sanding done after the major amount of assembling has been completed.

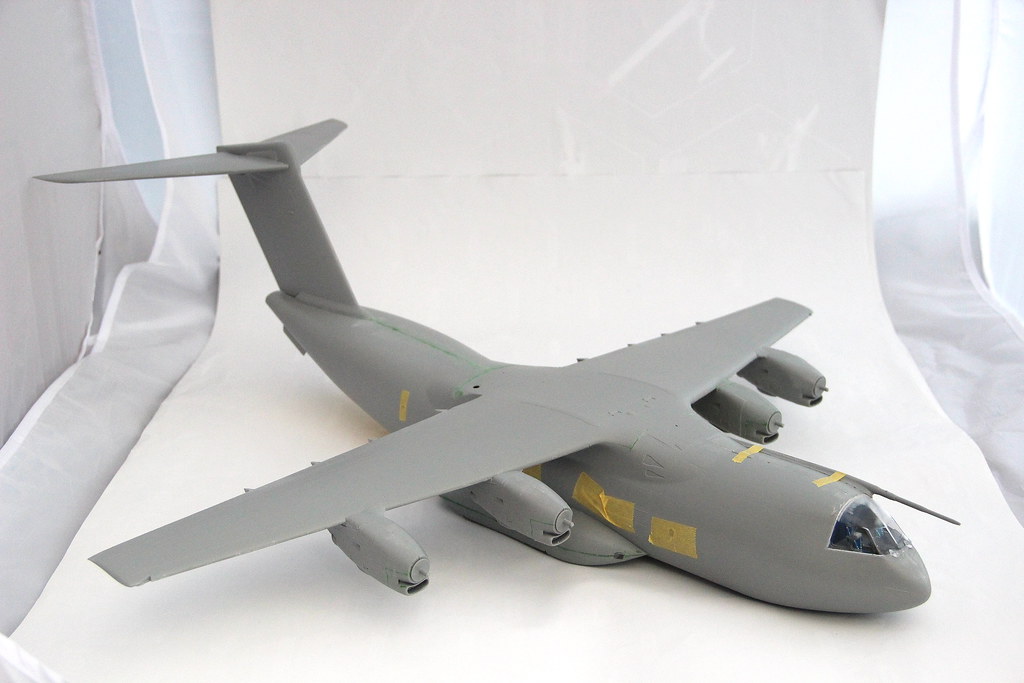
First painting session/s....
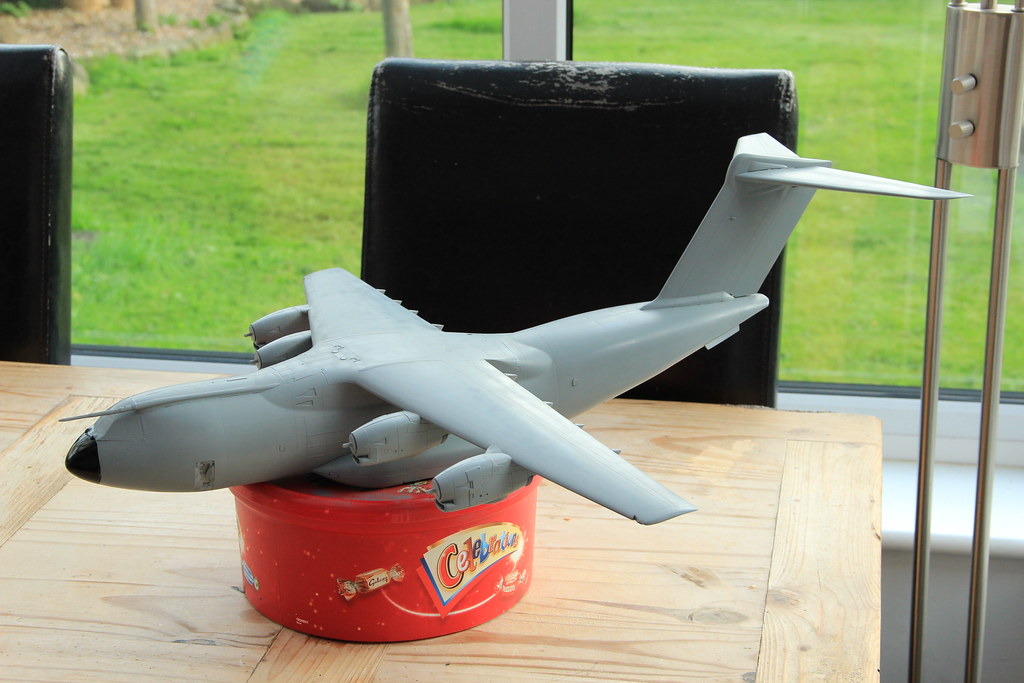

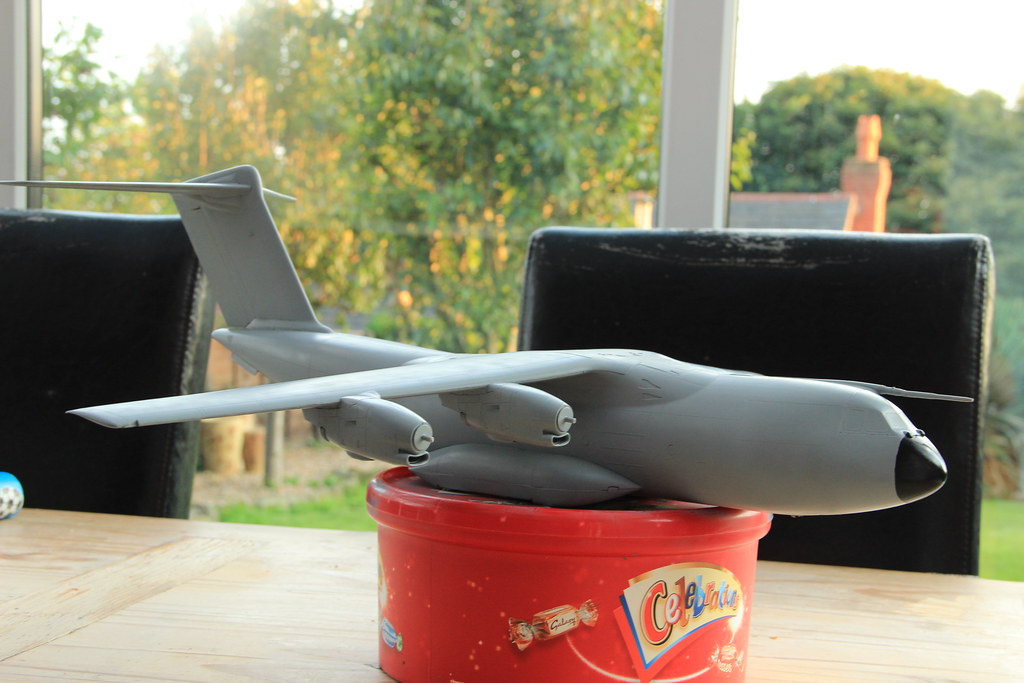

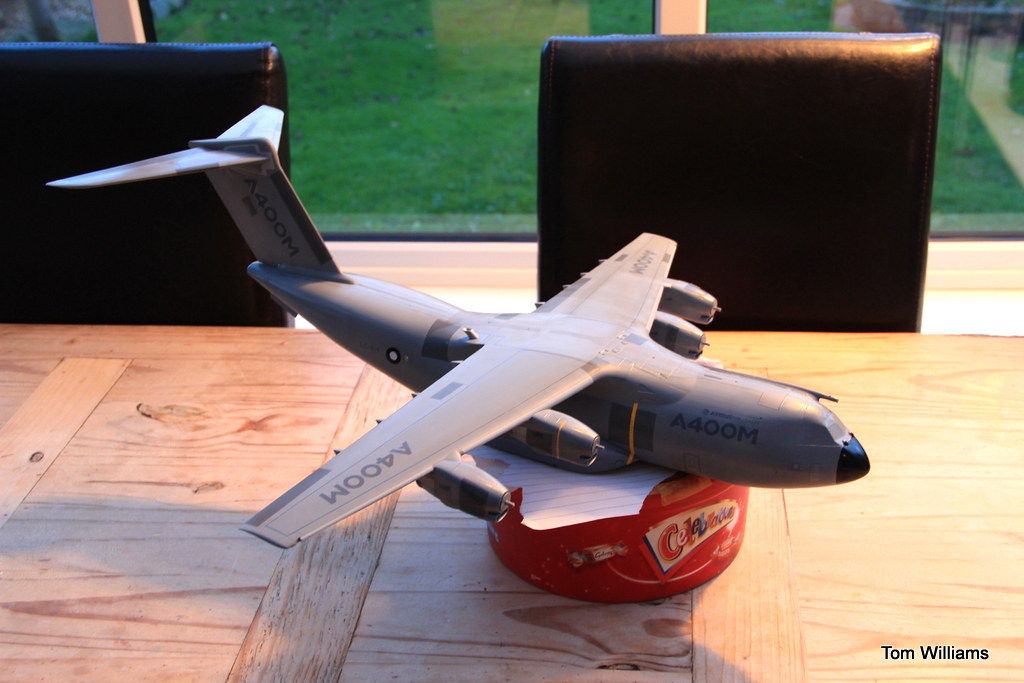
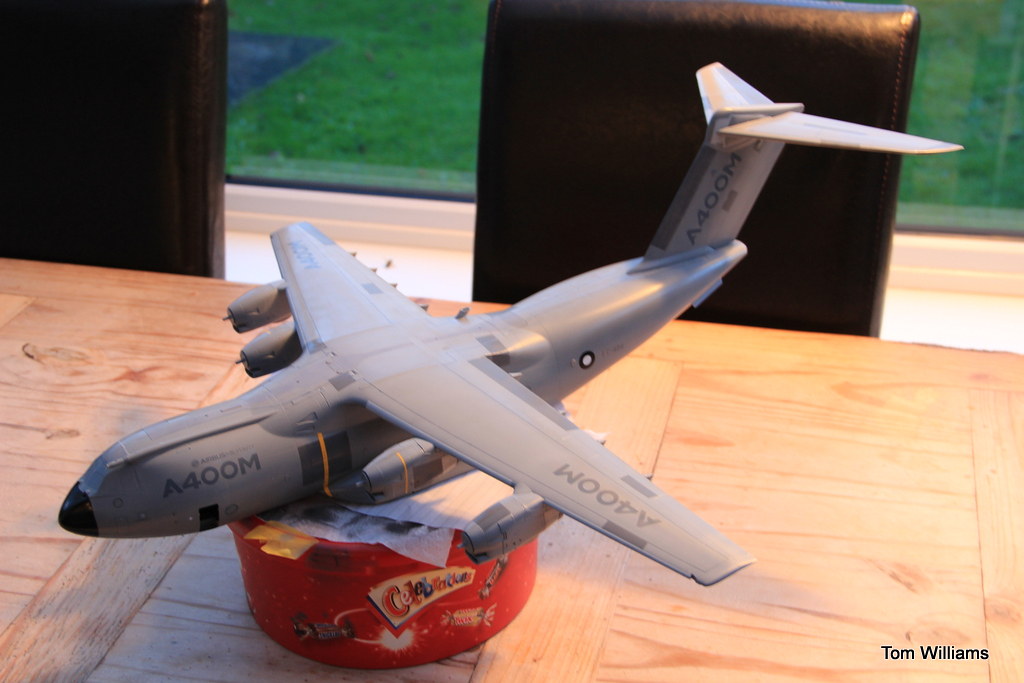
Where I am now, with some panels replaced after the hard graft the prototypes are currently doing.


The only problem I have after all the painting is done is what aircraft to depict her as. Revell give two options for the Airbus prototypes, EC-402 ( seen by many on here at RIAT 2010 ) or EC-404. Decisions decisions....
Kind Regards,
Tom
Box shot to begin with then!
A little dry fit to begin with, after the sub assemblies had been assembled.
And to prove it's size, here is a 1:72 Su-35, which is in itself a big model.
The interior, painted and assembled.
Most of the filling and sanding done after the major amount of assembling has been completed.
First painting session/s....
Where I am now, with some panels replaced after the hard graft the prototypes are currently doing.
The only problem I have after all the painting is done is what aircraft to depict her as. Revell give two options for the Airbus prototypes, EC-402 ( seen by many on here at RIAT 2010 ) or EC-404. Decisions decisions....
Kind Regards,
Tom
TomTwin- Posts : 24
Join date : 2012-09-10
Re: Revell 1:72 Airbus A400M
![]() scotthldr Mon 10 Sep 2012, 08:12
scotthldr Mon 10 Sep 2012, 08:12
Very impressive, now I'm not a "What If" man myself but what about doing it in the markings of one the future users?

scotthldr- Posts : 166
Join date : 2012-09-06
Age : 51
Location : Inverness

jamesv9820- Moderator
- Posts : 126
Join date : 2012-09-06
Location : South Lincolnshire
Re: Revell 1:72 Airbus A400M
![]() TomTwin Mon 10 Sep 2012, 10:10
TomTwin Mon 10 Sep 2012, 10:10
Well I've already painted this one, looks like I'm doing another one, maybe a future RAF one? I'm sure the serials have been sorted, just need the squadron and code and I'll do it!  Thanks for the suggestion!
TomTwin- Posts : 24
Join date : 2012-09-10
Re: Revell 1:72 Airbus A400M
![]() Vlad the Inhaler Tue 11 Sep 2012, 22:59
Vlad the Inhaler Tue 11 Sep 2012, 22:59
TomTwin wrote:Well I've already painted this one, looks like I'm doing another one, maybe a future RAF one? I'm sure the serials have been sorted, just need the squadron and code and I'll do it!
Nice work Tom! You put a lot of effort into painting the insides - is there anyway you will be able to appreciate that when its finished?
The reason i ask is that i have a couple of models that i have looked at reviews of where people paint the insides and i'm wondering if i'll get to see any of it if i decide to do the same?

Vlad the Inhaler- Posts : 69
Join date : 2012-09-09
Location : Lancs
Re: Revell 1:72 Airbus A400M
![]() Dan214sqn Wed 12 Sep 2012, 06:24
Dan214sqn Wed 12 Sep 2012, 06:24
that looks mint
I must have a go at one of these myself, hows it gone together??
I must have a go at one of these myself, hows it gone together??

Dan214sqn- Posts : 39
Join date : 2012-09-08
Age : 38
Location : Derbyshire
Re: Revell 1:72 Airbus A400M
![]() mattlaker Wed 12 Sep 2012, 09:26
mattlaker Wed 12 Sep 2012, 09:26
Vlad the Inhaler wrote:TomTwin wrote:Well I've already painted this one, looks like I'm doing another one, maybe a future RAF one? I'm sure the serials have been sorted, just need the squadron and code and I'll do it!
Nice work Tom! You put a lot of effort into painting the insides - is there anyway you will be able to appreciate that when its finished?
The reason i ask is that i have a couple of models that i have looked at reviews of where people paint the insides and i'm wondering if i'll get to see any of it if i decide to do the same?
I have to admit, I love detailing the interior, which is not obvious to a casual observer, however, I know it's there! I once did a phantom with a 1:48 scale copy of The Sun from the era in the backseater's bit, and no-one ever notices it!!!

mattlaker- Posts : 63
Join date : 2012-09-12
mattlaker- Posts : 63
Join date : 2012-09-12
Re: Revell 1:72 Airbus A400M
![]() TomTwin Thu 13 Sep 2012, 10:35
TomTwin Thu 13 Sep 2012, 10:35
[quote="Dan214"Vlad the Inhaler wrote:TomTwin wrote:Well I've already painted this one, looks like I'm doing another one, maybe a future RAF one? I'm sure the serials have been sorted, just need the squadron and code and I'll do it!
Nice work Tom! You put a lot of effort into painting the insides - is there anyway you will be able to appreciate that when its finished?
The reason i ask is that i have a couple of models that i have looked at reviews of where people paint the insides and i'm wondering if i'll get to see any of it if i decide to do the same?
that looks mint
I must have a go at one of these myself, hows it gone together?? [/quote]
Cheers guys for the comments, much appreciated!
Vlad, I always detail the interior of these kits regardless of visibilty from the outside. It's good practice, and also this model's interior is very visible, the door is huge so the bay is going to be seen very easily on the outside. Both the loading door and crew entry doors will be open, so the interior is going to be seen at some point!
Dan, it hasn't gone together too badly, though the interior assembly and the join to the main airframe needed some fettling and filler, and some filler was required on the joins of the wings to the fuselage and also behind the wings and in front of the tail. Minor problems really, nothing some filler won't solve, so overall, not too bad
TomTwin- Posts : 24
Join date : 2012-09-10
Re: Revell 1:72 Airbus A400M
![]() Dan214sqn Mon 17 Sep 2012, 03:21
Dan214sqn Mon 17 Sep 2012, 03:21
well, there aint many kits that dont need filler!!!
il get hold of one at some point, be a build for the future though i think when some RAF decals come available
il get hold of one at some point, be a build for the future though i think when some RAF decals come available
Dan214sqn- Posts : 39
Join date : 2012-09-08
Age : 38
Location : Derbyshire
Re: Revell 1:72 Airbus A400M
![]() jamesv9820 Mon 17 Sep 2012, 07:37
jamesv9820 Mon 17 Sep 2012, 07:37
It is a good kit to build and to be honest is a bit of a beast. I was just disappointed when I built mine that the undercarriage was so waek and would not support anything!
jamesv9820- Moderator
- Posts : 126
Join date : 2012-09-06
Location : South Lincolnshire
Re: Revell 1:72 Airbus A400M
![]() TomTwin Mon 17 Sep 2012, 08:11
TomTwin Mon 17 Sep 2012, 08:11
jamesv9820 wrote:It is a good kit to build and to be honest is a bit of a beast. I was just disappointed when I built mine that the undercarriage was so waek and would not support anything!
Good job I have some SAC Metal Landing Gear!
TomTwin- Posts : 24
Join date : 2012-09-10
Re: Revell 1:72 Airbus A400M
![]() jamesv9820 Mon 17 Sep 2012, 08:13
jamesv9820 Mon 17 Sep 2012, 08:13
You will need it Tom - it is truely shocking! It is actually the bits that hold the wheels in place that are so badly designed, Revell should be shot for suggesting an undercarrige section that they insist on gluing the brake disc in place, followed by the wheel
jamesv9820- Moderator
- Posts : 126
Join date : 2012-09-06
Location : South Lincolnshire
Re: Revell 1:72 Airbus A400M
![]() Tom Sunley Thu 20 Sep 2012, 07:56
Tom Sunley Thu 20 Sep 2012, 07:56
TomTwin wrote:Well I've already painted this one, looks like I'm doing another one, maybe a future RAF one? I'm sure the serials have been sorted, just need the squadron and code and I'll do it!
no squadron info as yet but codes are reserved from ZM400 to ZM421 Hope that helps. And nice work so far!
Tom Sunley- Posts : 24
Join date : 2012-09-11
Age : 61
Location : Burghead, Moray, Near RAF Lossiemouth -

Re: Revell 1:72 Airbus A400M
![]() TomTwin Thu 25 Oct 2012, 12:58
TomTwin Thu 25 Oct 2012, 12:58
Many thanks for the comments guys, much appreciated! 
Finally, here is some progress on this beast.
I have got most of the decals on, but unfortunately, Revell don't give you the centre walkway as a decal, so you have to paint it. And this ties in with another bad point to this kit - The confusing instructions! Some decals are repeated twice on the instructions, and other decals have different numbers that simply don't match up onto the sheet. Furthermore, the walkway position is difficult to decipher without applying the lines that surround it, so I have a bit more painting to do after this stage, which does infuriate me a bit. You also have to cut the door decals to make them settle, as if you tried to apply the decal as one it would shrivel and curl up, ask me how I know..... A simple horizontal cut, seperating the decal in two, and lining the two bits up is a much easier and better way of dealing with this problem.
But the worst bit about these decals was indeed the walkway lines - They were simply torture! Each one is so fiddly, and as I mentioned before, the decals and numbers don't add up. Some decals are too lomg or too short, and some ( like the leading edge decals for the wing ) are TWO decals for one line. Why? Why not have ONE decal for ONE line! Simply dreadful torture putting them on, but thankfully my endless patience saved me from wrecking them completely.
I'm going to post some pretty crap pics from my phone, mainly as the light in my computer room is crap and there will be too much noise on the DSLR for any decent piccies, I'll take some better ones when the main walkway is painted and the rest of the decals are on.

Kind Regards,
Tom
Finally, here is some progress on this beast.
I have got most of the decals on, but unfortunately, Revell don't give you the centre walkway as a decal, so you have to paint it. And this ties in with another bad point to this kit - The confusing instructions! Some decals are repeated twice on the instructions, and other decals have different numbers that simply don't match up onto the sheet. Furthermore, the walkway position is difficult to decipher without applying the lines that surround it, so I have a bit more painting to do after this stage, which does infuriate me a bit. You also have to cut the door decals to make them settle, as if you tried to apply the decal as one it would shrivel and curl up, ask me how I know.....
But the worst bit about these decals was indeed the walkway lines - They were simply torture! Each one is so fiddly, and as I mentioned before, the decals and numbers don't add up. Some decals are too lomg or too short, and some ( like the leading edge decals for the wing ) are TWO decals for one line. Why? Why not have ONE decal for ONE line!
I'm going to post some pretty crap pics from my phone, mainly as the light in my computer room is crap and there will be too much noise on the DSLR for any decent piccies, I'll take some better ones when the main walkway is painted and the rest of the decals are on.
Kind Regards,
Tom
TomTwin- Posts : 24
Join date : 2012-09-10
Re: Revell 1:72 Airbus A400M
![]() scotthldr Thu 25 Oct 2012, 20:02
scotthldr Thu 25 Oct 2012, 20:02
Nothing worse than when you've spent all the time and effort building and painting for the decals to let you down, stick with it and I'm sure you'll sort it out. If all else fails decal it up in RAF colours.
I've noticed of recent that manufacturers seem to be making a lot of mistakes with instructions and markings which can only be down to poor research and quality control but they don't mind charging as a fortune for it. Hasegawa especially have released some howlers recently with their Hellenic RF-4E and F-16 "Zeus" kits having wrong decals/placement guides and completely wrong painting guides. Always better to check with online references and not to rely on box instructions
I've noticed of recent that manufacturers seem to be making a lot of mistakes with instructions and markings which can only be down to poor research and quality control but they don't mind charging as a fortune for it. Hasegawa especially have released some howlers recently with their Hellenic RF-4E and F-16 "Zeus" kits having wrong decals/placement guides and completely wrong painting guides. Always better to check with online references and not to rely on box instructions
scotthldr- Posts : 166
Join date : 2012-09-06
Age : 51
Location : Inverness
Re: Revell 1:72 Airbus A400M
![]() TomTwin Mon 05 Nov 2012, 03:59
TomTwin Mon 05 Nov 2012, 03:59
Right guys, another update.
The main walkway is now painted on, and I am glad to see the majority, if not all, of the silvering I encountered has vanished after I applied a coat of Klear on top. Marvellous! :biggrin:
I would recommend painting the walkway after you apply the top surface lines, much easier to decipher where to paint than to follow the wretched instructions. The colour is simply Humbrol 125 lightened with Tamiya XF-2 White.
Next up are to paint some orange day-glo panels that these test aircraft wear, and perhaps some light compass grey in colour "strips" I have seen the test aircraft sporting on their jollys. After that, it's a case of applying the remaining decals, sealing them with a coat of Klear and applying some light weathering, a simple panel wash and some leaking oil from certain panels with AK interactive Streaking Grime, which I will be using on another project soon, guess which one... :whistle:
I'm thinking about not painting any exhaust stains on this bird, simply as I haven't seen any photos of her with them.
Anyway, onto the quickly taken pics then, a few with the kitchen light on and some with natural light ( well, as much light as there is at half 4 these days! ;
;

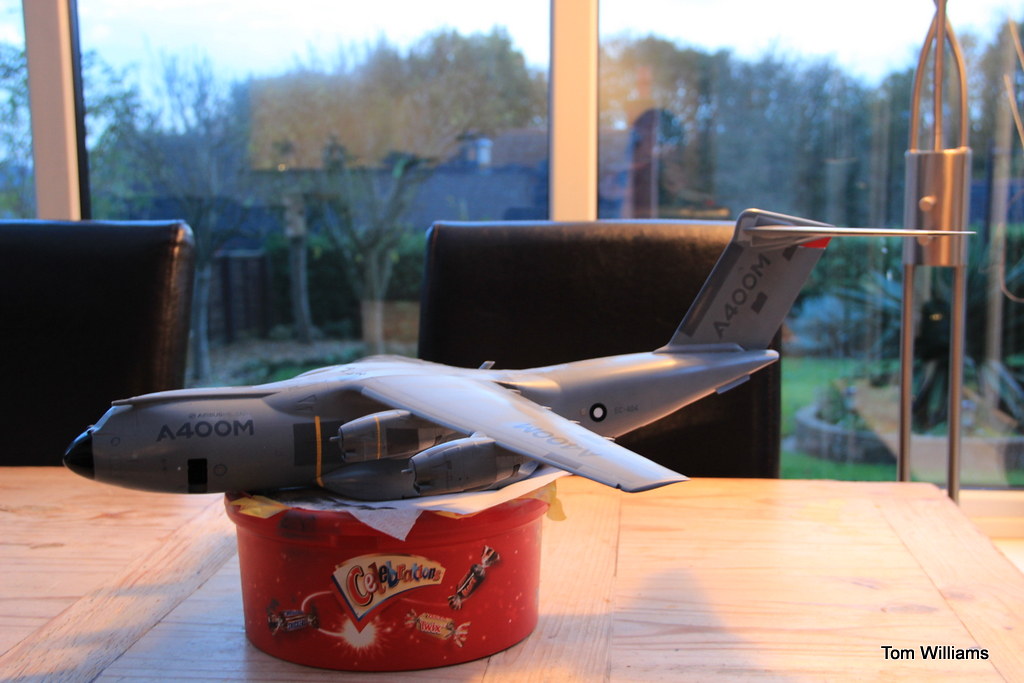
The A400M logo and front of the main walkway;

And the rear of it;

Finally two of her in natural light;


Cheers,
Tom
The main walkway is now painted on, and I am glad to see the majority, if not all, of the silvering I encountered has vanished after I applied a coat of Klear on top. Marvellous! :biggrin:
I would recommend painting the walkway after you apply the top surface lines, much easier to decipher where to paint than to follow the wretched instructions. The colour is simply Humbrol 125 lightened with Tamiya XF-2 White.
Next up are to paint some orange day-glo panels that these test aircraft wear, and perhaps some light compass grey in colour "strips" I have seen the test aircraft sporting on their jollys. After that, it's a case of applying the remaining decals, sealing them with a coat of Klear and applying some light weathering, a simple panel wash and some leaking oil from certain panels with AK interactive Streaking Grime, which I will be using on another project soon, guess which one... :whistle:
I'm thinking about not painting any exhaust stains on this bird, simply as I haven't seen any photos of her with them.
Anyway, onto the quickly taken pics then, a few with the kitchen light on and some with natural light ( well, as much light as there is at half 4 these days!
The A400M logo and front of the main walkway;
And the rear of it;
Finally two of her in natural light;
Cheers,
Tom
TomTwin- Posts : 24
Join date : 2012-09-10
Re: Revell 1:72 Airbus A400M
![]() Dan214sqn Wed 14 Nov 2012, 05:31
Dan214sqn Wed 14 Nov 2012, 05:31
looks great, def one for me in the future this
Dan214sqn- Posts : 39
Join date : 2012-09-08
Age : 38
Location : Derbyshire
Re: Revell 1:72 Airbus A400M
![]() TomTwin Wed 12 Dec 2012, 11:33
TomTwin Wed 12 Dec 2012, 11:33
Cheers mate
Apologies for the lack of updates to this, or any other kits I am building, but I'm suffering a huge bout of modellers block currently, and am trying to shift it quickly, some exciting projects are coming my way very soon, and I really want to whittle down my stash, that is slowly getting larger.
I should have an update on this soon, once I finish my touch ups and weathering.
TomTwin- Posts : 24
Join date : 2012-09-10
» Revell 1:72 Junkers Ju-290 A7
» Revell 1:144 A-90 Orlyonok Ekranoplan
» 1/72 Revell Hawker Hunter FGA.9
» Revell 1:144 A-90 Orlyonok Ekranoplan
» 1/72 Revell Hawker Hunter FGA.9
Page 1 of 1
Permissions in this forum:
You cannot reply to topics in this forum|
|
|