


1/32 Tornado GR1 to GR4 conversion updated Nov 24th

1/32 Tornado GR1 to GR4 conversion updated Nov 24th
![]() Tom Sunley Wed 14 Nov 2012, 08:47
Tom Sunley Wed 14 Nov 2012, 08:47
Feel free to suggest different/better ways of tackling any stages as we encounter them. Always open for alternatives.
Right.......the kit.
Starting point will be Revell's Tornado

She's a lovely kit out of the box. Built a few in my time.
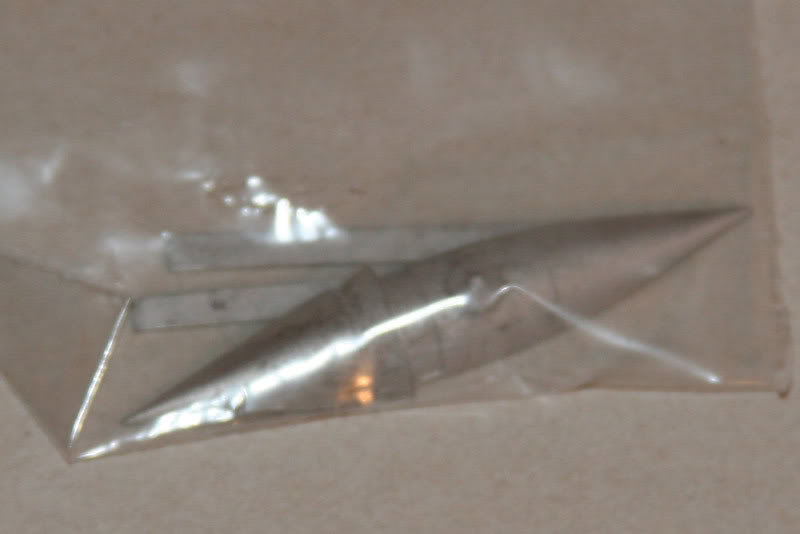
And some of the extra parts. (Waiting for more at the moment and will update as and when things arrive)
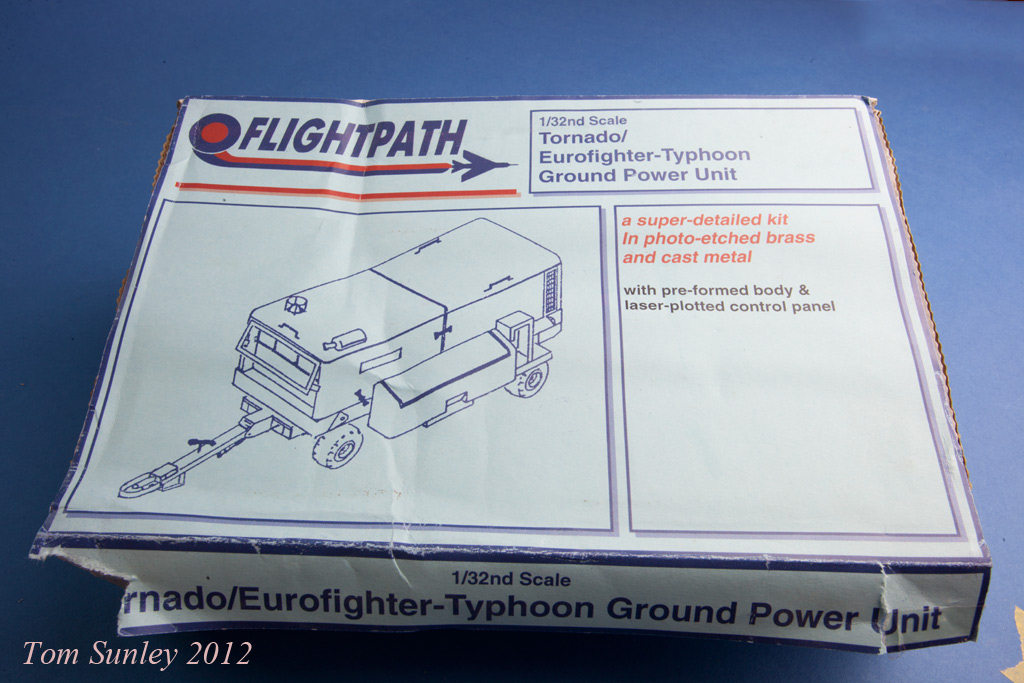
The Flightpath GR4 update set
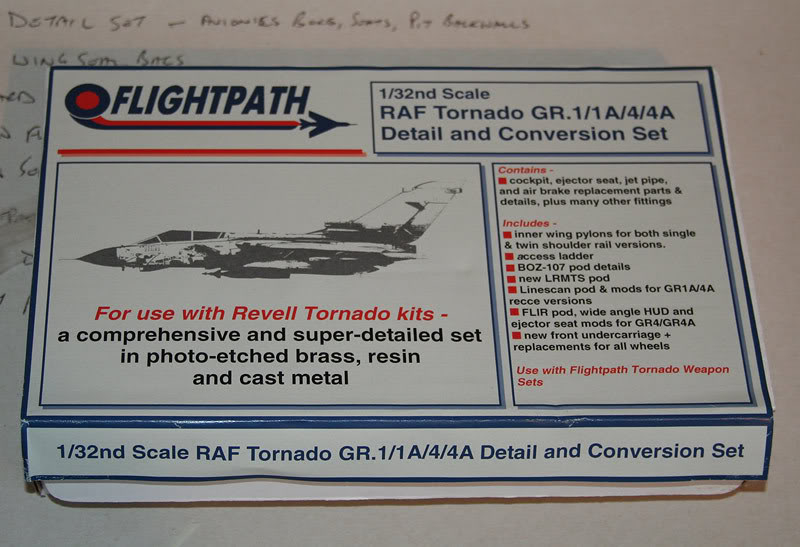
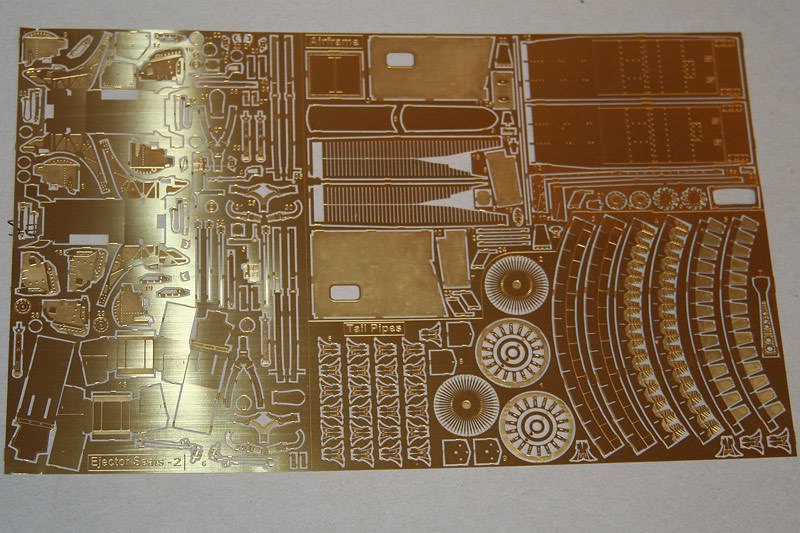
Comprising the following


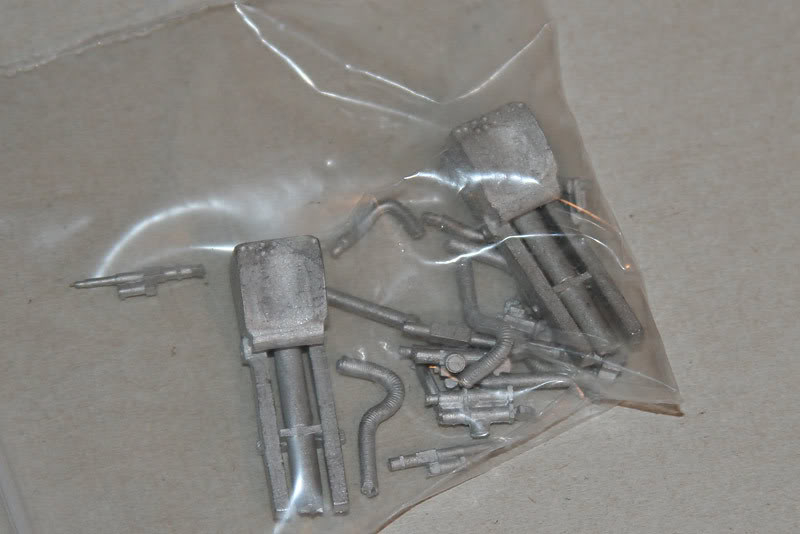

I also have Paragon seats

Flightpath Alarm missiles

Paragon Flaps and slats

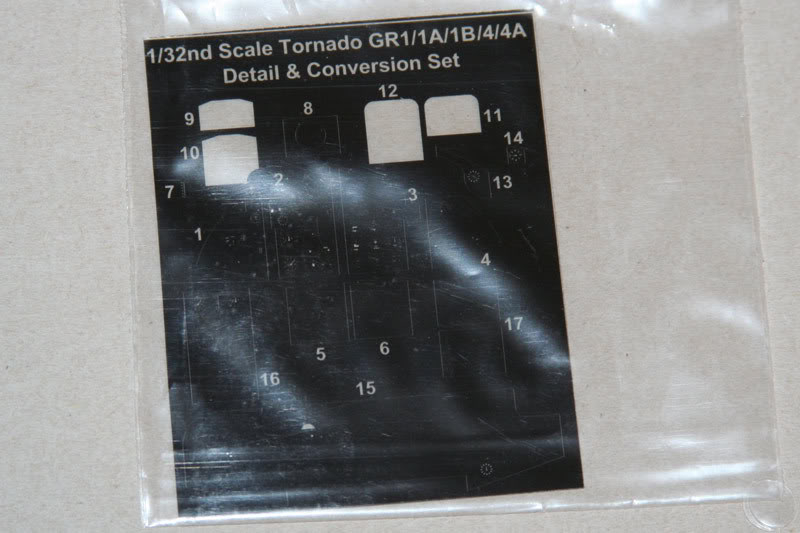
CAM detail set with cockpit and electronics panel details

CMR wing glove boxes

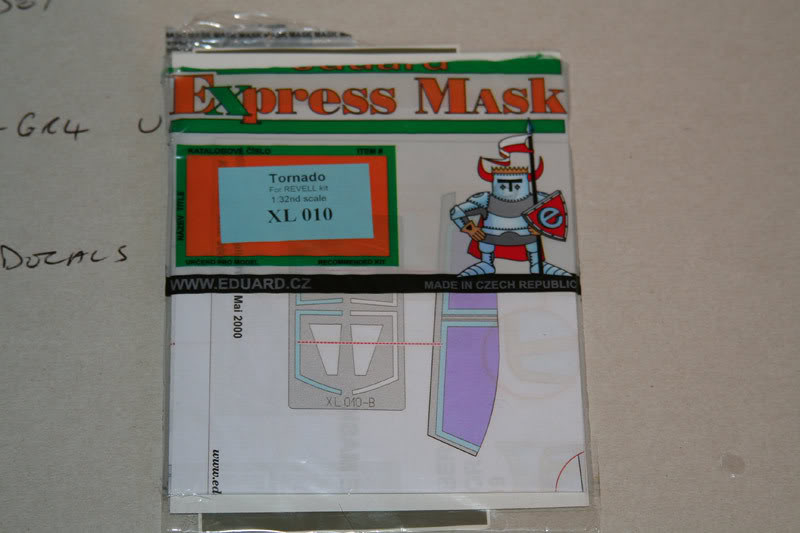
Eduard canopy and wheel mask set
I currently am waiting on the arrival of some turned brass pitot and aoa probes and also some Aires resin exhausts. I'm in the process of deciding whether to get the Aires resin cockpit as well but this is an IDS or GR1 pit and would require a lot of mods so not sure yet.
Anyway, off to get changed and start some work on it. Let me know what you think.
Last edited by Tom Sunley on Sun 25 Nov 2012, 08:08; edited 2 times in total
Tom Sunley- Posts : 24
Join date : 2012-09-11
Age : 61
Location : Burghead, Moray, Near RAF Lossiemouth -

Re: 1/32 Tornado GR1 to GR4 conversion updated Nov 24th
![]() Tom Sunley Wed 14 Nov 2012, 08:51
Tom Sunley Wed 14 Nov 2012, 08:51
Photo etch rudder pedals replace the kits plastic chunks

Next up the front instrument panel was located for some treatment. Here it is just off the sprue showing the provided detail which is ok really.

But we don't want that in this build so out came the sanders and it was gone!

To be replaced with some more photo etch and transparencies. Guages look a little rough at the moment but the white glue is still in the process of drying here.

Next up came some photo etch bending as i turned to the navigators displays in between the two cockpits. Here are a couple of the MFD's pre bending.

And then after a little bending and shaping.
Added the acetate guages and gave the displays a coat of black

More etch bends being added. Loads more still to add!
And that's where i left it for the day.
Tom Sunley- Posts : 24
Join date : 2012-09-11
Age : 61
Location : Burghead, Moray, Near RAF Lossiemouth -
Re: 1/32 Tornado GR1 to GR4 conversion updated Nov 24th
![]() Tom Sunley Wed 14 Nov 2012, 08:52
Tom Sunley Wed 14 Nov 2012, 08:52

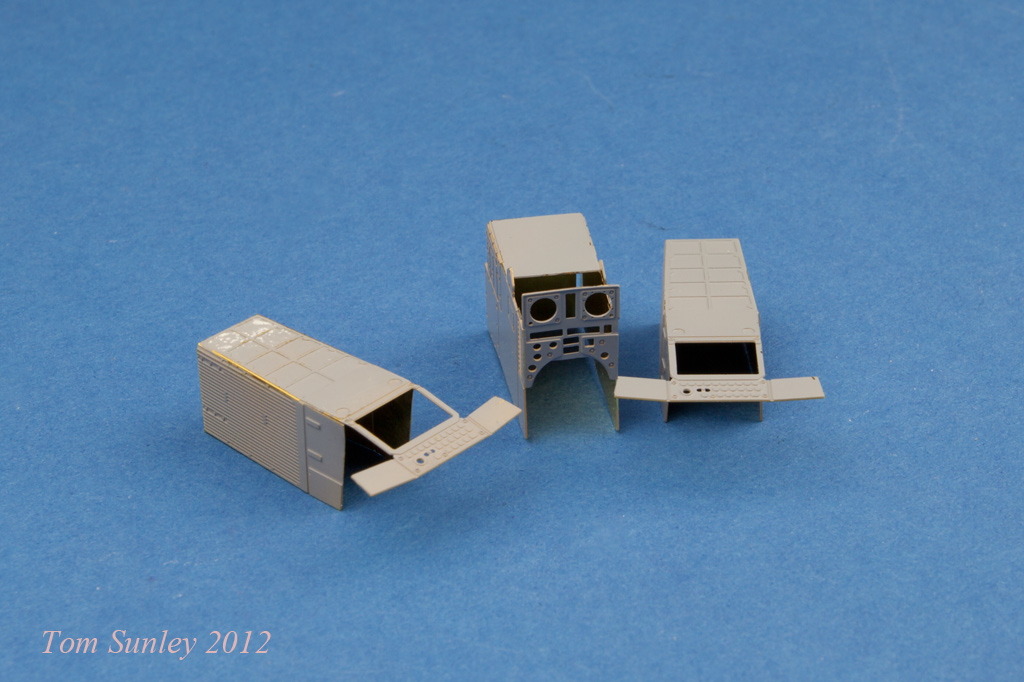
Decided to have a break from the etch tonight so moved on to some resin work. Here are some of the avionics panels i'll be installing. They are from the CAM detail set.

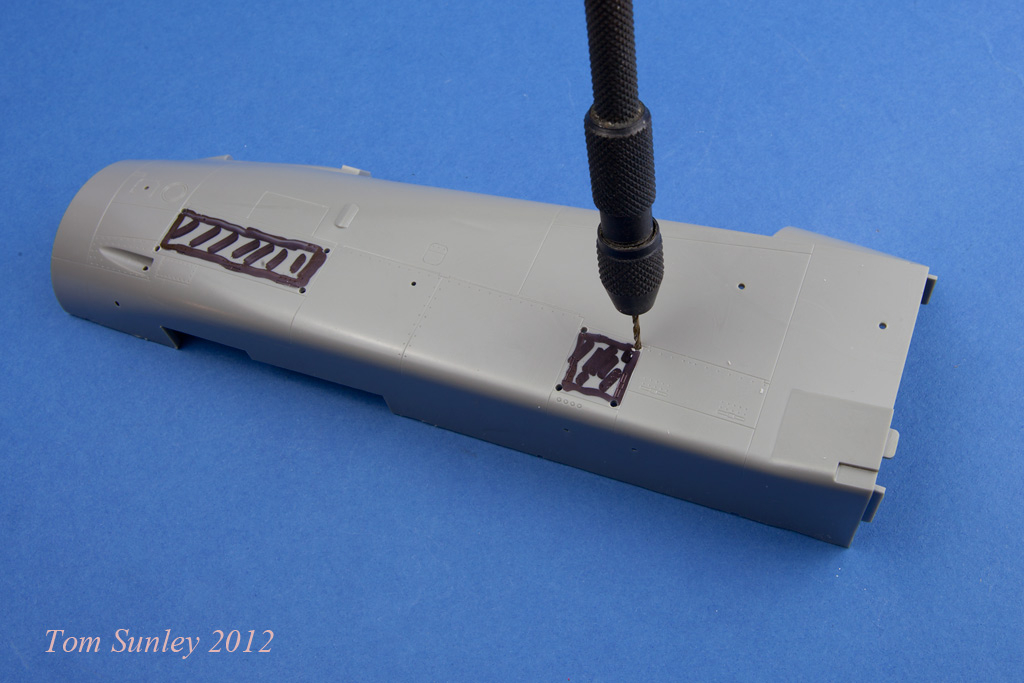
Panels to be removed were marked with a pen

A small drill in a pin vice was used to drill a link of holes all around the inside of the panel to be removed.
Next a scalpel was carefully traced along the centre of the holes to gently scribe a line through the holes until the panel became free
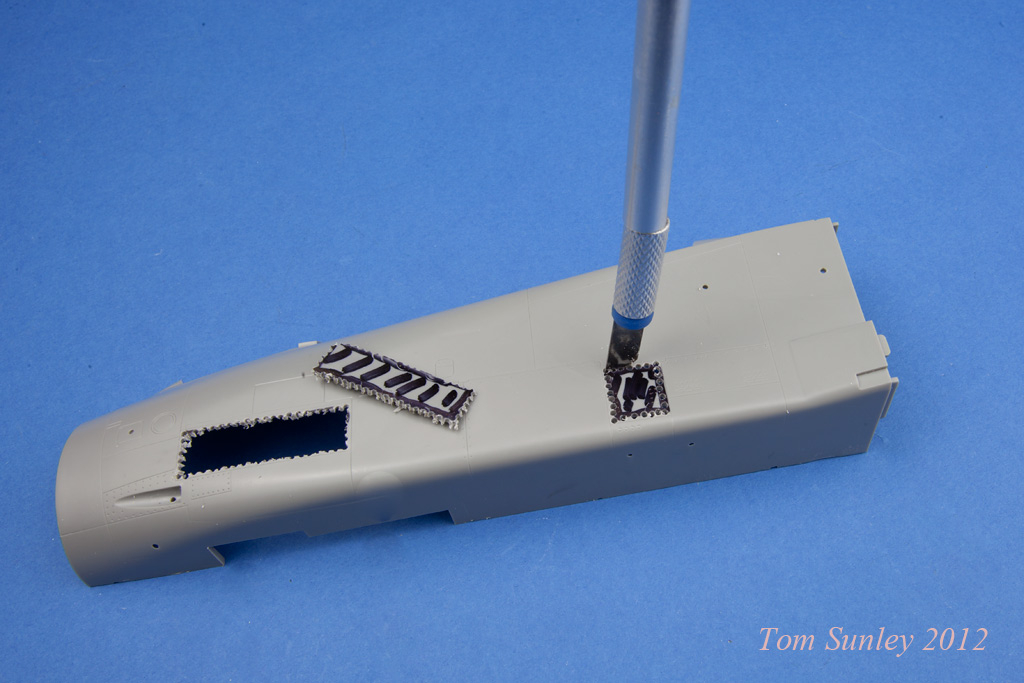
The rough edges were then sanded back carefully until the edge of the panel lines were met. Checking for nice square corners.

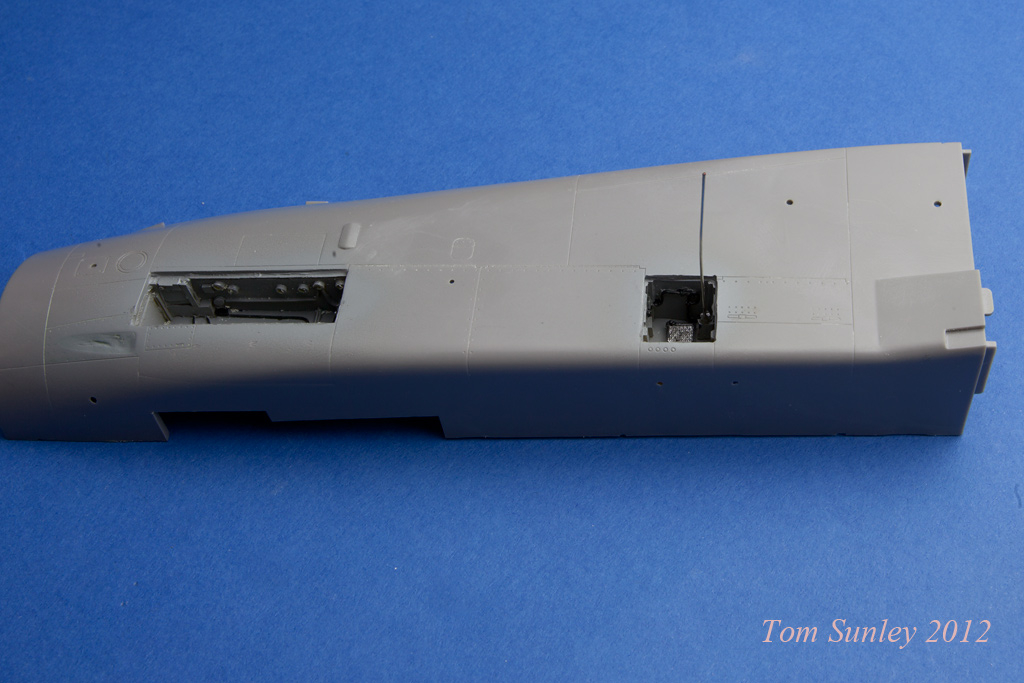
The corresponding avionix panel was test fitted in the newly created hole checking it all fitted nicely.

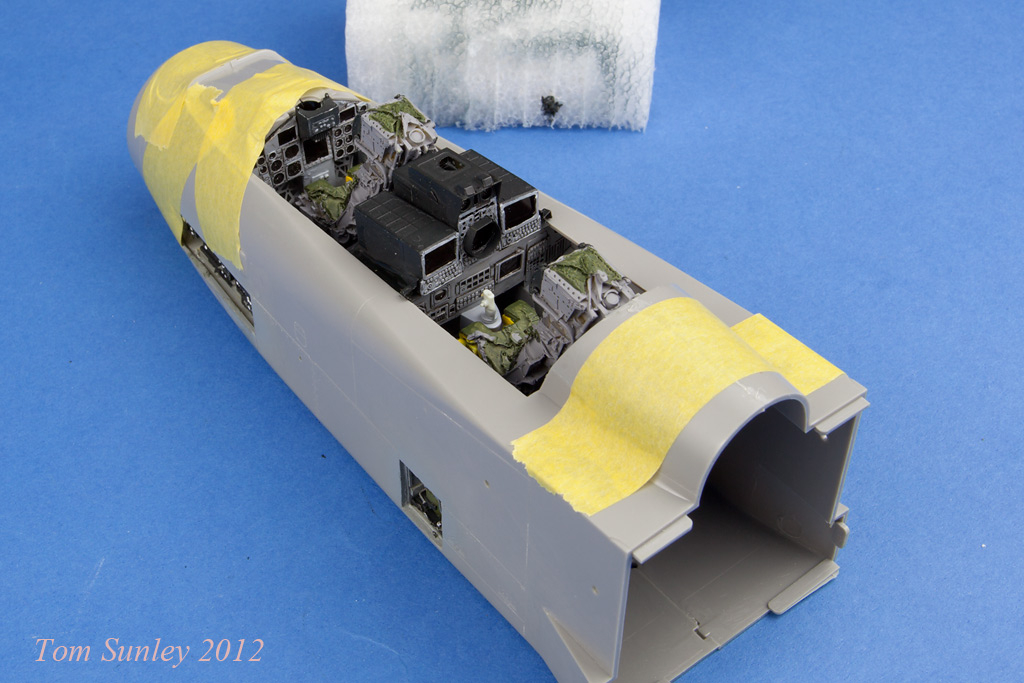
One of the items on the conversion from GR1 to GR4 was now tackled. Namely the port cannon which is not used in the GR4. Tape was placed around the panel so that any wayward putty would not be caught in there. I used Squadron's "Green Putty" for this and will need to go over it again tomorrow as it shrinks a bit when it dries.

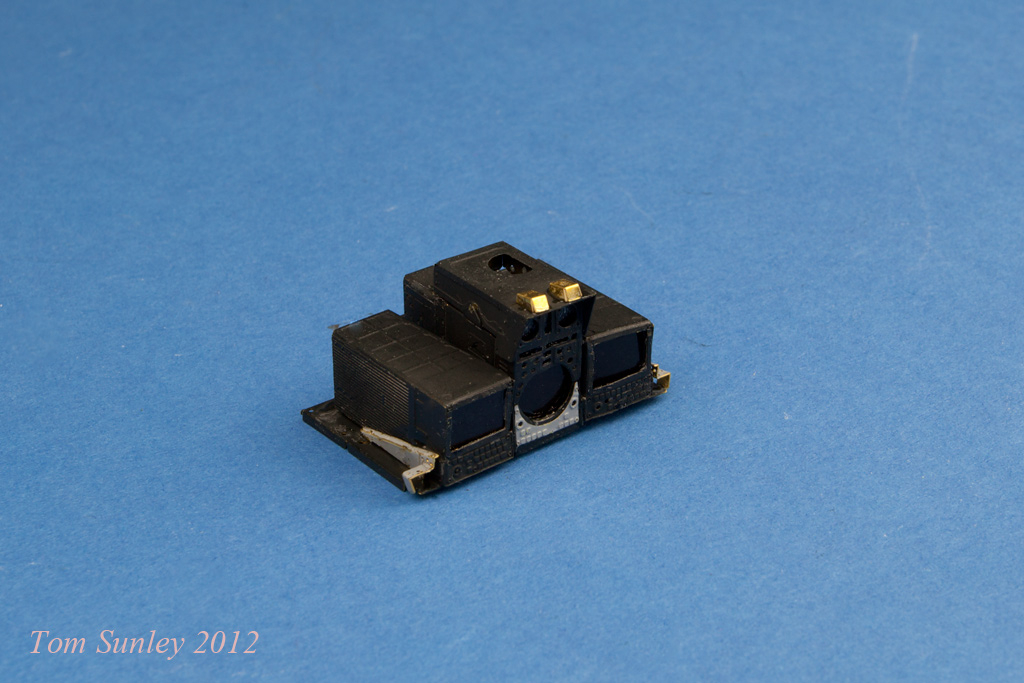
Eventually both avionics panels and the LOX panel were all in place.

These were sprayed grey and some detailing work was started before fitting the avionics themselves.

Some thin fuse wire was attched in preparation for fitting of LOX bottle. The wire would serve nicely as piping for the bottle.
LOX bottle fitted and plumbed in with a pound coin in the way for scale.

And that's where we're at tonight. Thanks for looking.
Tom Sunley- Posts : 24
Join date : 2012-09-11
Age : 61
Location : Burghead, Moray, Near RAF Lossiemouth -
Re: 1/32 Tornado GR1 to GR4 conversion updated Nov 24th
![]() Tom Sunley Wed 14 Nov 2012, 08:53
Tom Sunley Wed 14 Nov 2012, 08:53

And added another two update items to the pile.

Tom Sunley- Posts : 24
Join date : 2012-09-11
Age : 61
Location : Burghead, Moray, Near RAF Lossiemouth -
Re: 1/32 Tornado GR1 to GR4 conversion updated Nov 24th
![]() Tom Sunley Wed 14 Nov 2012, 08:54
Tom Sunley Wed 14 Nov 2012, 08:54
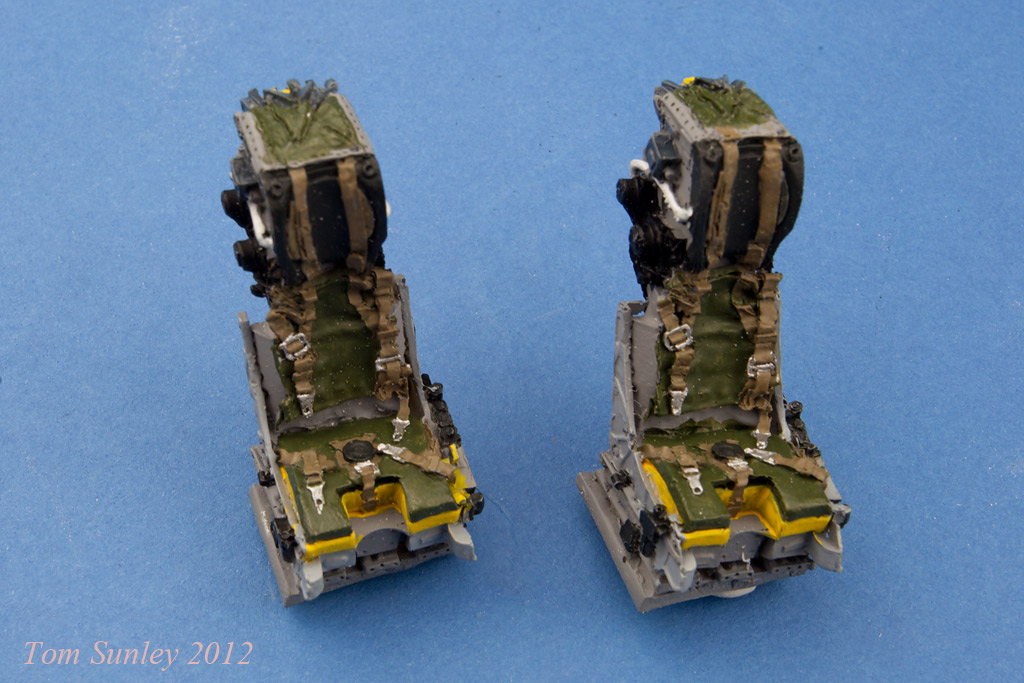
Here are the seats with a primer coat on ready to get started.

Navigators centre screen had a photo etch shroud which had to be rolled into its circular shape. Pressing it between a paintbrush shaft and my thumb i gently rolled it back and forth untill it started taking its shape. Once almost there the end tab was folded over to give the flat spot at the top. A small amount of ca glue was applied to the join and held until it set. Once dry it was attached to the instrument panel with pva glue and left to dry.

Now the instrument panel was drying a got the cockpit tub cemented inside the halves and got them together. The nav instrument panel was fixed in place and the assembly taped up until the cement hardened. More work was carried out on detailing the seats while this took place.


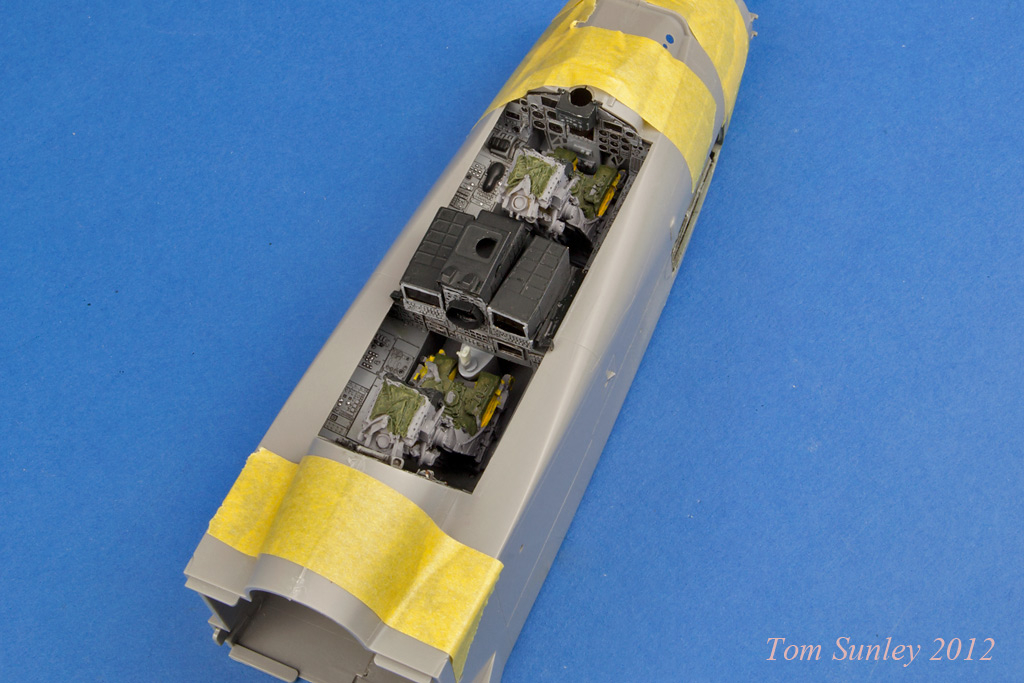

Next up was some more photo etch work. This time building up the cockpit sills.

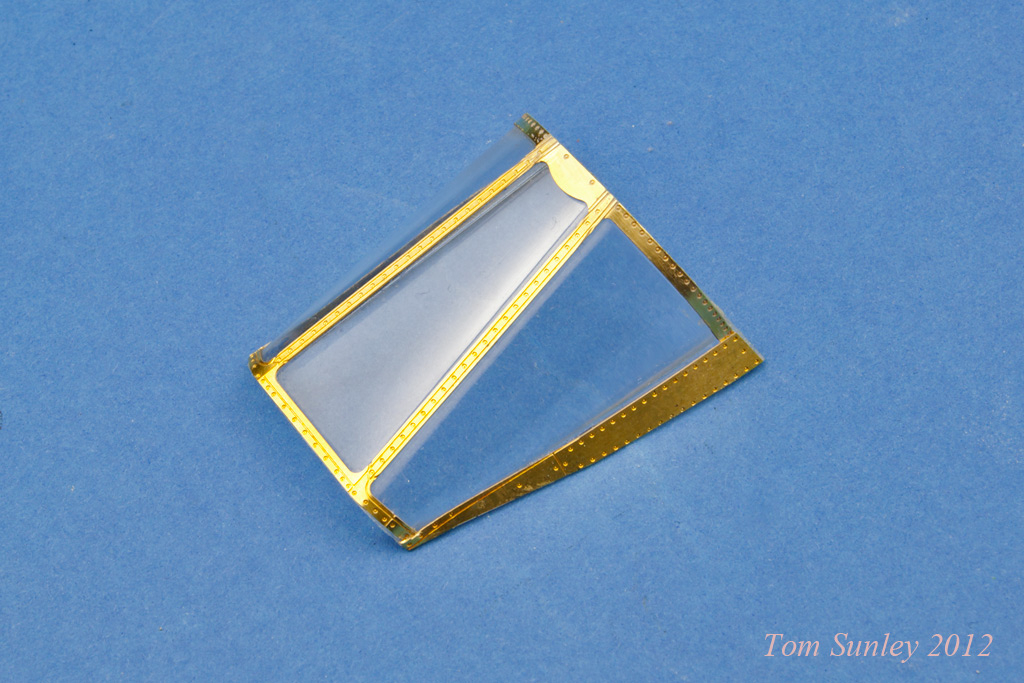
A tricky part now. Included in the Flightpath detail set are photo etch parts for the glazing frames to give them more accurate details / shape. A dab of ca glue was applied at one corner and the photo etch was held in place until the glue bit. Another dab was place a little further along then the frame was, again, held in place and so on until the frame was fully fixed around the glazing.

And that's it for this update.
Tom Sunley- Posts : 24
Join date : 2012-09-11
Age : 61
Location : Burghead, Moray, Near RAF Lossiemouth -
Re: 1/32 Tornado GR1 to GR4 conversion updated Nov 24th
![]() Tom Sunley Wed 14 Nov 2012, 08:55
Tom Sunley Wed 14 Nov 2012, 08:55

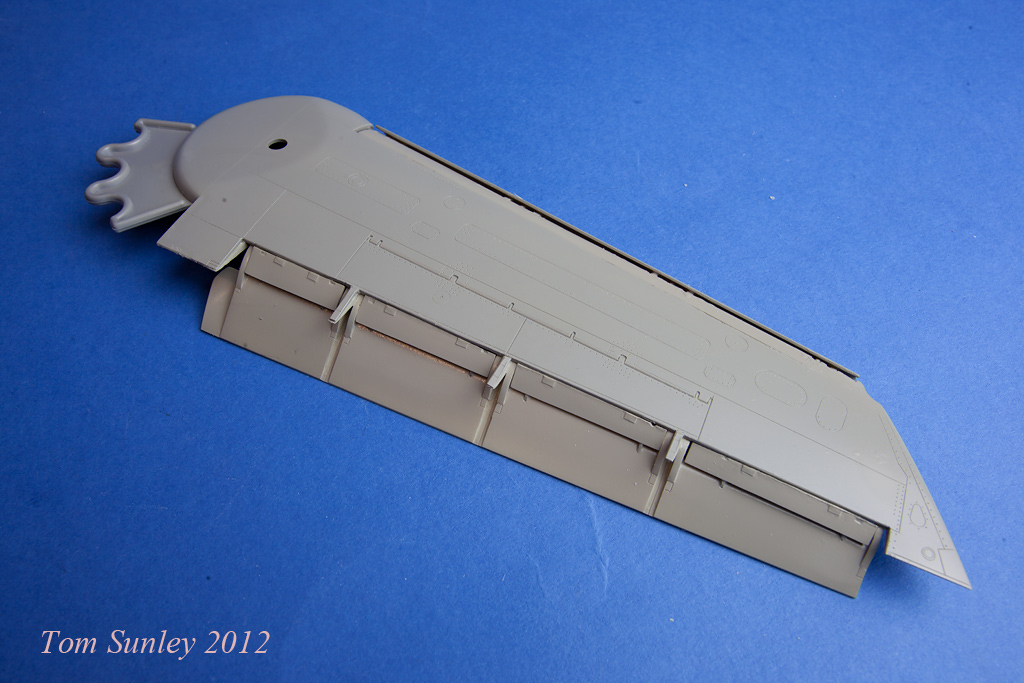
Then another change of direction. I thought i would tackle the Paragon Flap and slat urgrade. Was a bit daunted by this as i don't think i have all the instructions for the set. The parts all have numbers on the drawing i have but i don't have a map of the parts with their numbers so i had to guess a bit. Judge for yourself at the end of the update.
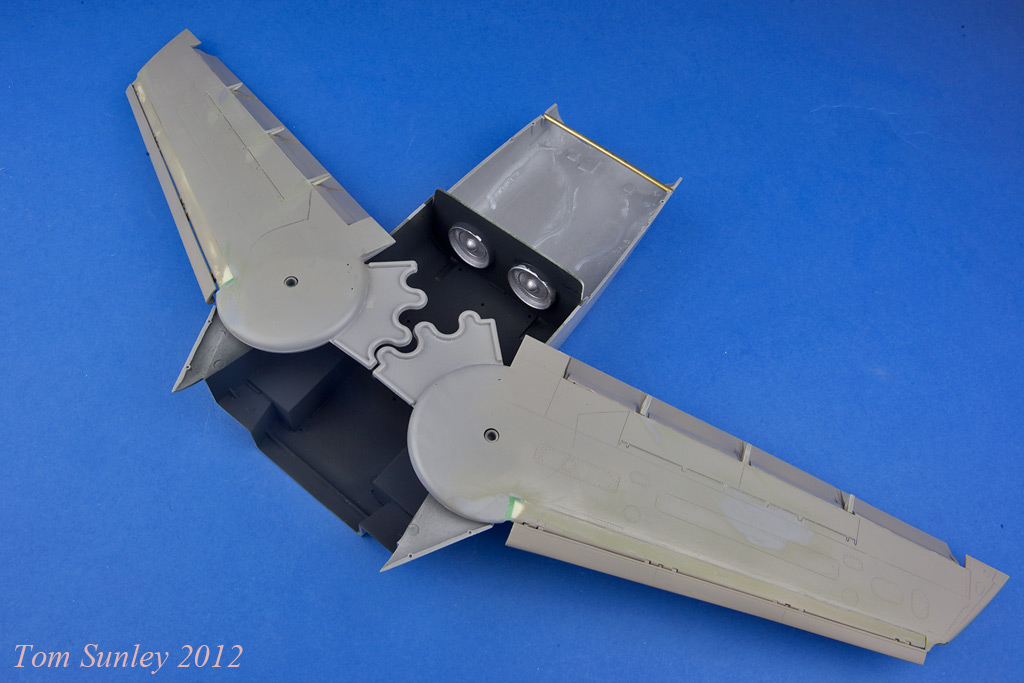
Started by cutting out the required sections from the upper and lower wing halves. For this i used a scribing tool and pulled gently along the panel lines getting progressively deeper until the cut broke through.

And here we have both starboard wing halves with the required cuts made and cleaned up.

Then started assembling the resin parts using CA glue to fix the parts in place.
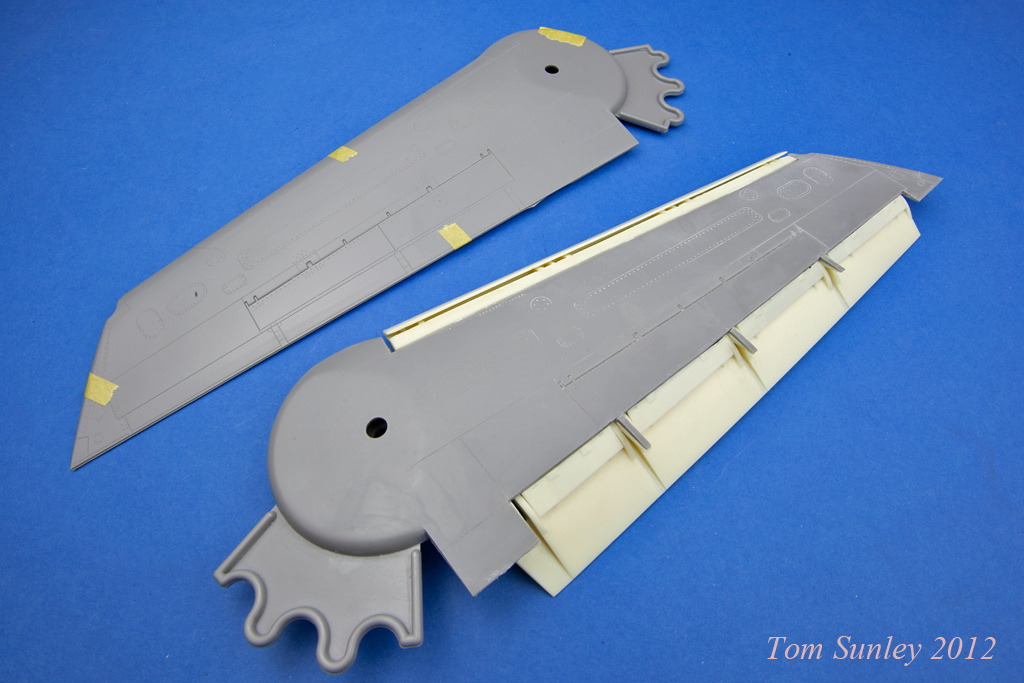

Then, once assembled i gave the wing an undercoat to see how it all looked. Still needs some cosmetic work and some light sanding here and there but i think the wing looks convincing enough. Still have the actuator screws to apply but will leave those until after painting.


Also progressed the detailing of the bang seats. Not long until these are completed.
And that's it for today. Hope you are enjoying. Comments / questions are welcome.
Tom Sunley- Posts : 24
Join date : 2012-09-11
Age : 61
Location : Burghead, Moray, Near RAF Lossiemouth -
Re: 1/32 Tornado GR1 to GR4 conversion updated Nov 24th
![]() Tom Sunley Wed 14 Nov 2012, 08:56
Tom Sunley Wed 14 Nov 2012, 08:56
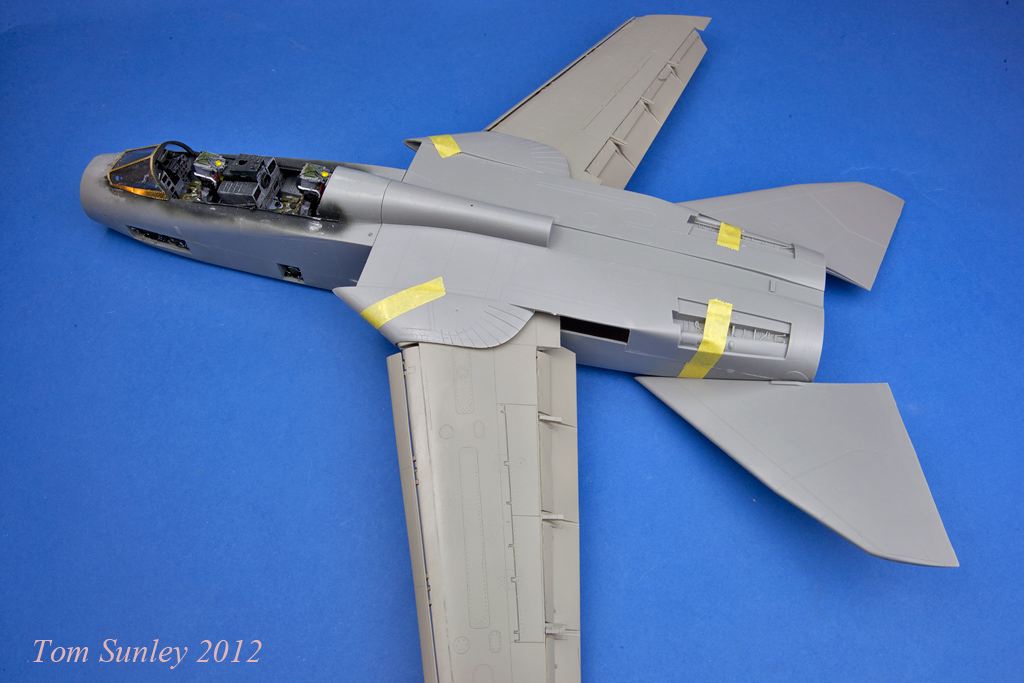
I picked up a length of 2mm brass rod and a piece of brass tube that the rod fit snugly inside. Using CA glue i stuck a piece of the tube to the inside of the fuselage lower half.

The lugs on the stabs were removed and a hole drilled in their place. The brass rod was cut 30mm longer than the piece of tube and fixed using CA glue inside the hole in one of the stabs. This was fed through the tube in the fuselage and the other stab fitted to the end of the rod.

Bet it doesn't break this time around!!
And here's a pic showing the stage we are at tonight. I finished the upgrade to the other wing also so it's really starting to come together now.
Thanks for looking.
Tom Sunley- Posts : 24
Join date : 2012-09-11
Age : 61
Location : Burghead, Moray, Near RAF Lossiemouth -
Re: 1/32 Tornado GR1 to GR4 conversion updated Nov 24th
![]() Tom Sunley Wed 14 Nov 2012, 08:57
Tom Sunley Wed 14 Nov 2012, 08:57
Little bit more progress on the Tonka today.
Used CMR wing bags as i think they look more realistic than the flath paragon offerings

Cemented the wings and bags into place.
Cemented the forward fuselage onto the main fuselage.

Then had a change in direction again and put the fin together. After a clean up of the fim seam lines it was sprayed and varnished ready for some decalling. Think you'll recognise which jet it is when you see the colour!
Had som decals made up for me and this looks a bit technical. They have to be sliced up and fitted one triangle at a time according to this instruction sheet!

Some of the tail decal

And removing the triangles
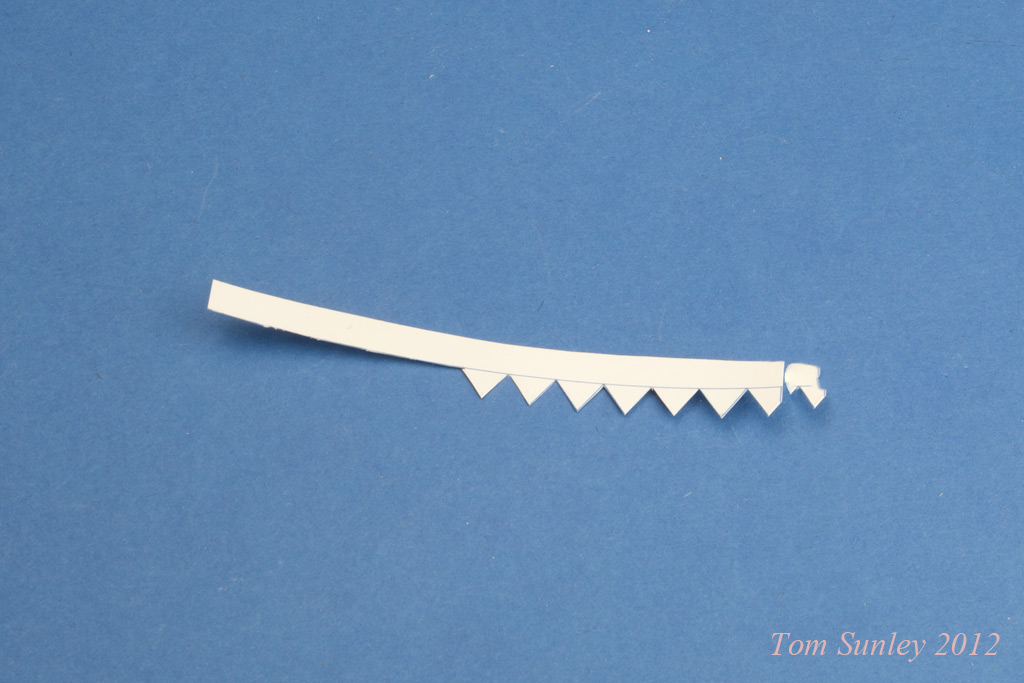
To fit one by one!

Gonna be a long job but if it works out it'll be worth it.
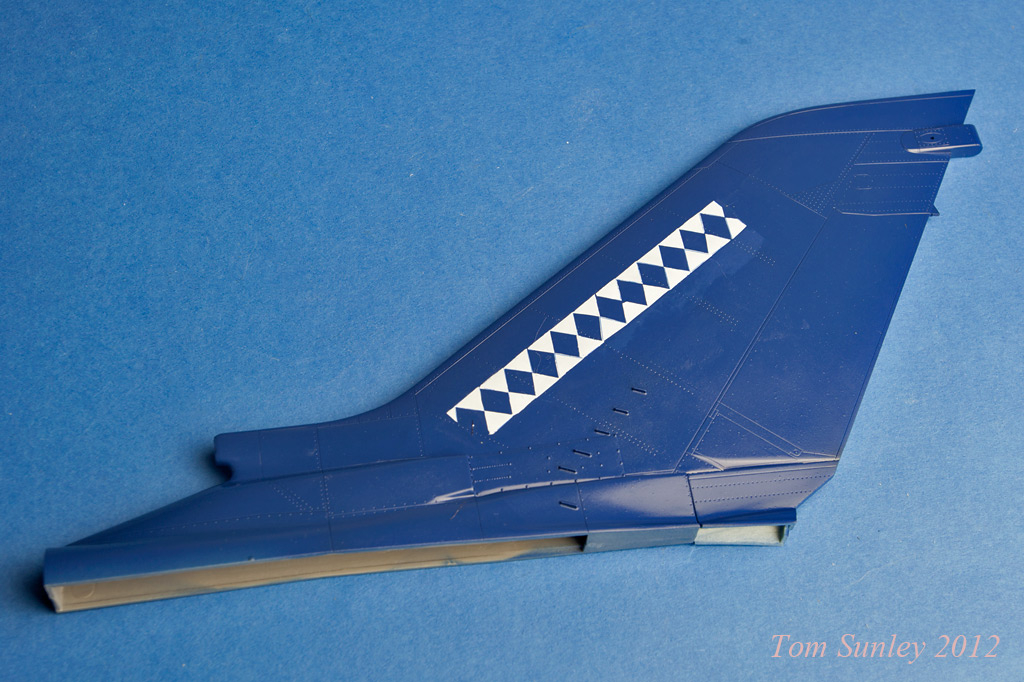
Had a sneaky try on to see how it looked!

Thanks for looking. Comments more than welcome. More soon.
Tom Sunley- Posts : 24
Join date : 2012-09-11
Age : 61
Location : Burghead, Moray, Near RAF Lossiemouth -
Re: 1/32 Tornado GR1 to GR4 conversion updated Nov 24th
![]() Tom Sunley Wed 14 Nov 2012, 08:58
Tom Sunley Wed 14 Nov 2012, 08:58
Couple of progress shots for you. Firstly the Flightpath set provides top panels for the intakes as Revell didn't provide any panelling detail at all in this area.
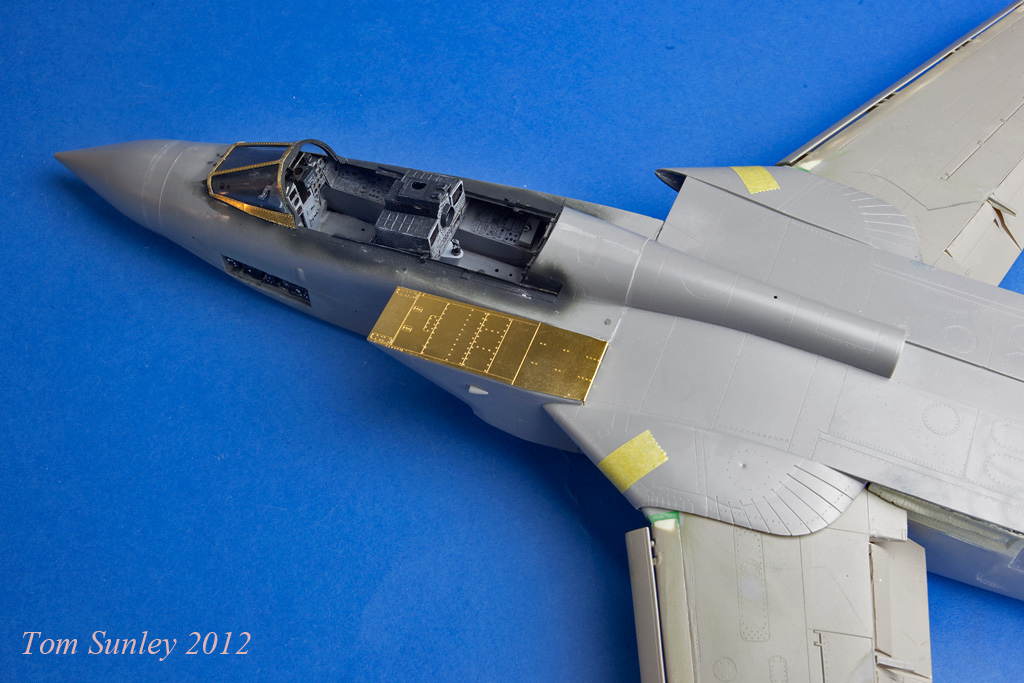
And an in situ pic of the tail so far

Hope you like. Thanks for looking.
Tom Sunley- Posts : 24
Join date : 2012-09-11
Age : 61
Location : Burghead, Moray, Near RAF Lossiemouth -
Re: 1/32 Tornado GR1 to GR4 conversion updated Nov 24th
![]() Abhorsen Wed 14 Nov 2012, 09:15
Abhorsen Wed 14 Nov 2012, 09:15
And now we are treated to this current build. Its great that you include all the stages with the resin and brass, it helps to see how it all comes together. These types of WIP are really inspirational (whether I will ever achieve anything of this nature is another matter).
Really enjoying this mate and looking forward to the next load of updates.
Ab
Abhorsen- Posts : 51
Join date : 2012-09-08
Age : 59
Location : Birmingham
Re: 1/32 Tornado GR1 to GR4 conversion updated Nov 24th
![]() logster Wed 14 Nov 2012, 10:22
logster Wed 14 Nov 2012, 10:22
Matt
logster- Posts : 29
Join date : 2012-09-11
Re: 1/32 Tornado GR1 to GR4 conversion updated Nov 24th
![]() jamesv9820 Wed 14 Nov 2012, 18:27
jamesv9820 Wed 14 Nov 2012, 18:27
I know we spoke ages ok about this one. I have a 617 gr1 in mind to do in the new year. Can't wait to see how yours completes
Keep up the great work

jamesv9820- Moderator
- Posts : 126
Join date : 2012-09-06
Location : South Lincolnshire
Re: 1/32 Tornado GR1 to GR4 conversion updated Nov 24th
![]() scotthldr Wed 14 Nov 2012, 21:26
scotthldr Wed 14 Nov 2012, 21:26
One note though, are you going to be using the ALARM's as I can't ever recall seeing a 14 Sqn jet carrying them?

scotthldr- Posts : 166
Join date : 2012-09-06
Age : 51
Location : Inverness
Re: 1/32 Tornado GR1 to GR4 conversion updated Nov 24th
![]() Tom Sunley Wed 14 Nov 2012, 21:30
Tom Sunley Wed 14 Nov 2012, 21:30
Tom Sunley- Posts : 24
Join date : 2012-09-11
Age : 61
Location : Burghead, Moray, Near RAF Lossiemouth -
Re: 1/32 Tornado GR1 to GR4 conversion updated Nov 24th
![]() scotthldr Sat 17 Nov 2012, 10:43
scotthldr Sat 17 Nov 2012, 10:43
scotthldr- Posts : 166
Join date : 2012-09-06
Age : 51
Location : Inverness
Re: 1/32 Tornado GR1 to GR4 conversion updated Nov 24th
![]() Dan214sqn Sun 18 Nov 2012, 23:17
Dan214sqn Sun 18 Nov 2012, 23:17
Great work , awesome in fact, looking forward to seeing your update

Dan214sqn- Posts : 39
Join date : 2012-09-08
Age : 38
Location : Derbyshire
Re: 1/32 Tornado GR1 to GR4 conversion updated Nov 24th
![]() Tom Sunley Sat 24 Nov 2012, 08:35
Tom Sunley Sat 24 Nov 2012, 08:35
Fitted the resin pods under the nose with CA glue. Some putty was required in the join too.

Got the resin exhausts assembled and painted the fitted to the back end. Will dirty them a bit more once the model is being weathered.

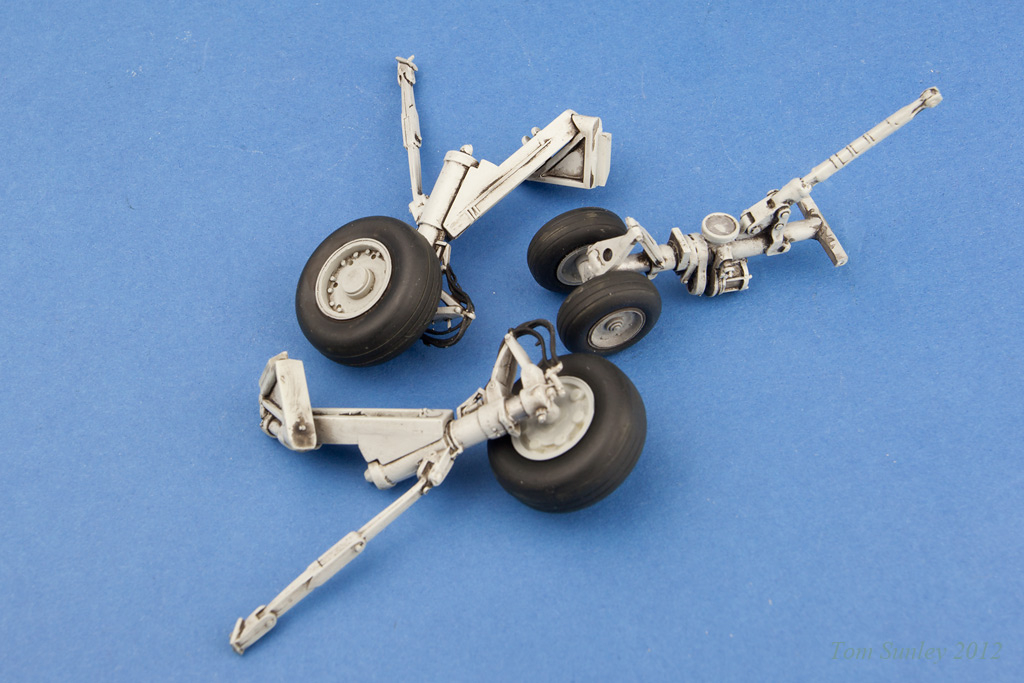
Assembled and painted the undercarriage. White metal and some plastic parts were used here.
Masked off and gave the panel lines a bit of a pre shade

More soon. Really starting to come together now.
Tom Sunley- Posts : 24
Join date : 2012-09-11
Age : 61
Location : Burghead, Moray, Near RAF Lossiemouth -
Re: 1/32 Tornado GR1 to GR4 conversion updated Nov 24th
![]() Abhorsen Sat 24 Nov 2012, 10:59
Abhorsen Sat 24 Nov 2012, 10:59
Ab
Abhorsen- Posts : 51
Join date : 2012-09-08
Age : 59
Location : Birmingham
Re: 1/32 Tornado GR1 to GR4 conversion updated Nov 24th
![]() Tom Sunley Sun 25 Nov 2012, 08:08
Tom Sunley Sun 25 Nov 2012, 08:08
For this i used Xtracrylix dark camo grey on the upper surfaces and camo grey on the lower surfaces.

Allowing the paintwork to dry i thought i would progress the fin. Nasked and painted the black and silver parts.

Little bit of artistic licence now as i thought i would add some replacement panels just like the real thing,
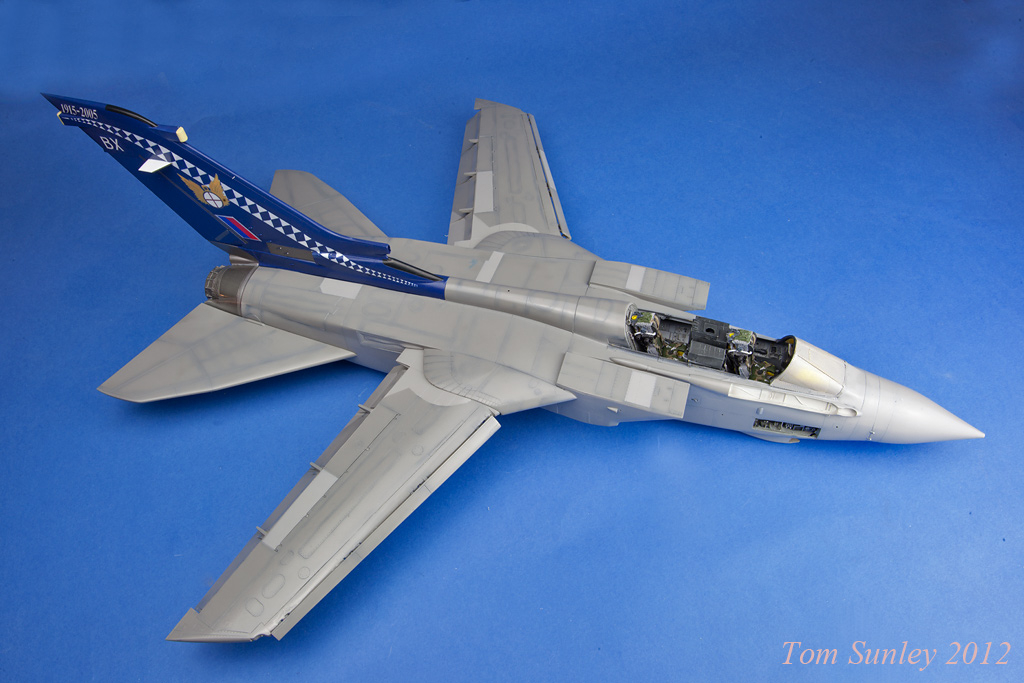
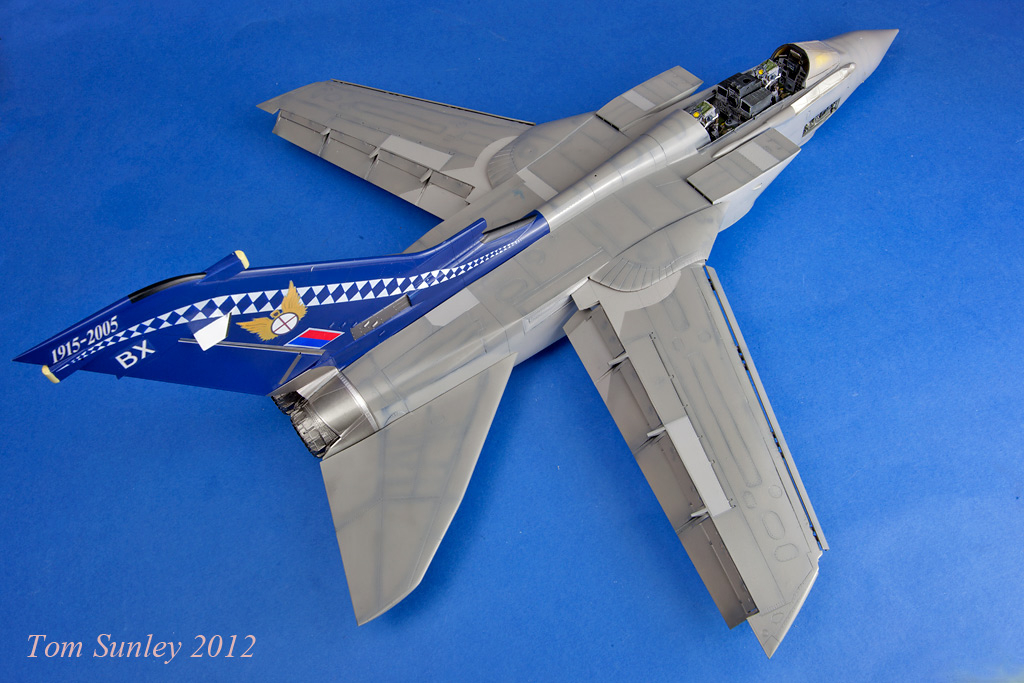
More soon. Thanks for looking. Your comments are more than welcome.
Tom Sunley- Posts : 24
Join date : 2012-09-11
Age : 61
Location : Burghead, Moray, Near RAF Lossiemouth -
Re: 1/32 Tornado GR1 to GR4 conversion updated Nov 24th
![]() tc2324 Tue 27 Nov 2012, 01:01
tc2324 Tue 27 Nov 2012, 01:01

tc2324- Posts : 55
Join date : 2012-09-29
Age : 53
Location : London
Re: 1/32 Tornado GR1 to GR4 conversion updated Nov 24th
![]() scotthldr Tue 27 Nov 2012, 07:25
scotthldr Tue 27 Nov 2012, 07:25
scotthldr- Posts : 166
Join date : 2012-09-06
Age : 51
Location : Inverness
Re: 1/32 Tornado GR1 to GR4 conversion updated Nov 24th
![]() mattlaker Tue 27 Nov 2012, 09:24
mattlaker Tue 27 Nov 2012, 09:24

mattlaker- Posts : 63
Join date : 2012-09-12
Re: 1/32 Tornado GR1 to GR4 conversion updated Nov 24th
![]() bluebottle Mon 29 Apr 2013, 04:18
bluebottle Mon 29 Apr 2013, 04:18
bluebottle- Posts : 2
Join date : 2013-02-18
» Panavia Tornado (all variants)
» Paint Conversion Tables
» 1/32 Scale Heritage F3 Conversion Finally here (for £50!)
» Ebay Heads Up: 1/48 Tornado GR/IDS Italeri/Paragon package